How to use the Publisheet Add-in for Excel
In this document, you will learn how to quickly publish your Excel worksheets as interactive web pages. You'll also learn more advanced publishing options.
Quick start
Let's go over the minimum set of steps that are required to publish your Excel worksheet to the web. Assuming you have installed and launched the Publisheet Add-in:
- Choose a Title for your published web page.
- In case you want to protect your web page from unauthorized viewers, provide a password in the Password field. Only people you share the chosen password with will be able to see the published web page.
- By default, Publisheet assumes you want to publish the full Used range of your worksheet. If that's the case, you don't need to change anything in this step but you can optionally provide a short Caption that will be displayed below your data in the resulting web page.
- Just hit Publish and, depending on the size and content of your worksheet, in a few seconds the process should have completed.
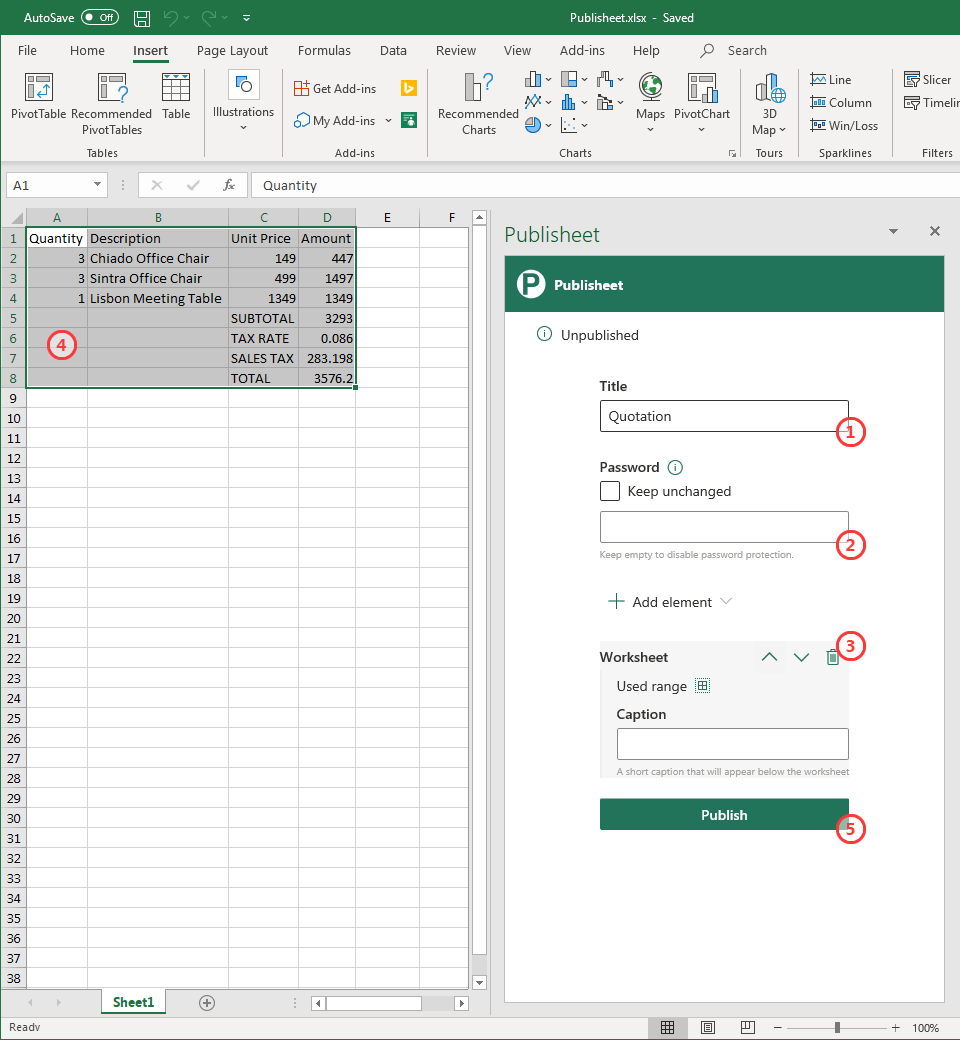
After publishing is complete, you'll get a Visit Webpage button at the top of the Add-in pane.
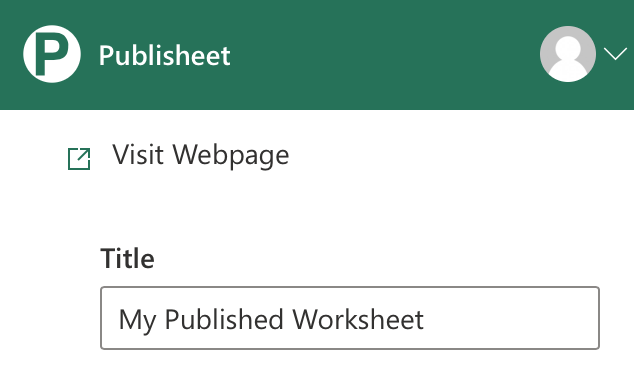
Click on it and and you'll be redirected to your newly published web page in your default browser. That's it, you're done!
Video demonstration
The following video is a demonstration of how easy and quick it is to publish your Excel worksheet to Publisheet.
Customize your published web page
If you wish to generate a more complex web page, you can add and configure one or more container elements which are laid out vertically in the web page.
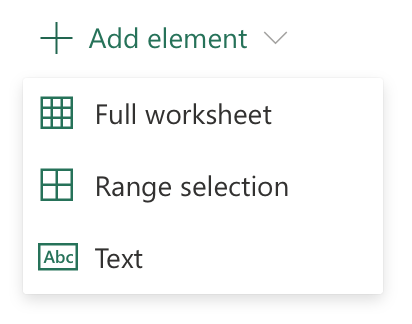
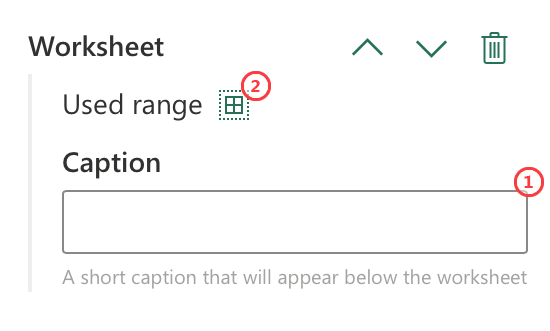
Full worksheet
This element represents the full used range of the worksheet. It will hold the range between the first (top left) and last (bottom right) cell that has either content or formatting. This element type is already pre-selected when you use Publisheet on a new worksheet so that getting started is just a matter of providing a Title and hitting Publish.
- You can optionally add a Caption that will appear below the published range.
- To see the exact range of your worksheet that will be published, press the cells icon.
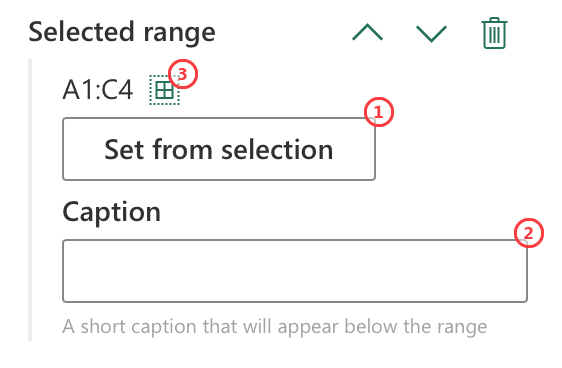
Range selection
This element is similar to the Full worksheet, but instead of representing the full used range, users can manually select the range that should be published. From a comprehensive worksheet you might be interested in only publishing a smaller subset.
- To set the range, just select a range of cells in the worksheet and press the Set from selection button.
- You can optionally add a Caption that will appear below the range.
- To see your selected range in the worksheet, press the cells icon.
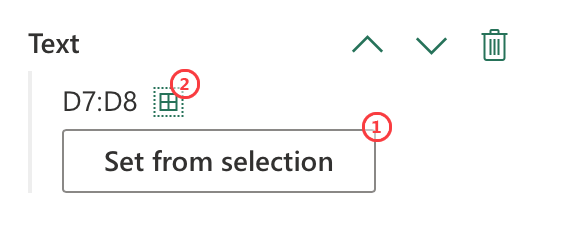
Text
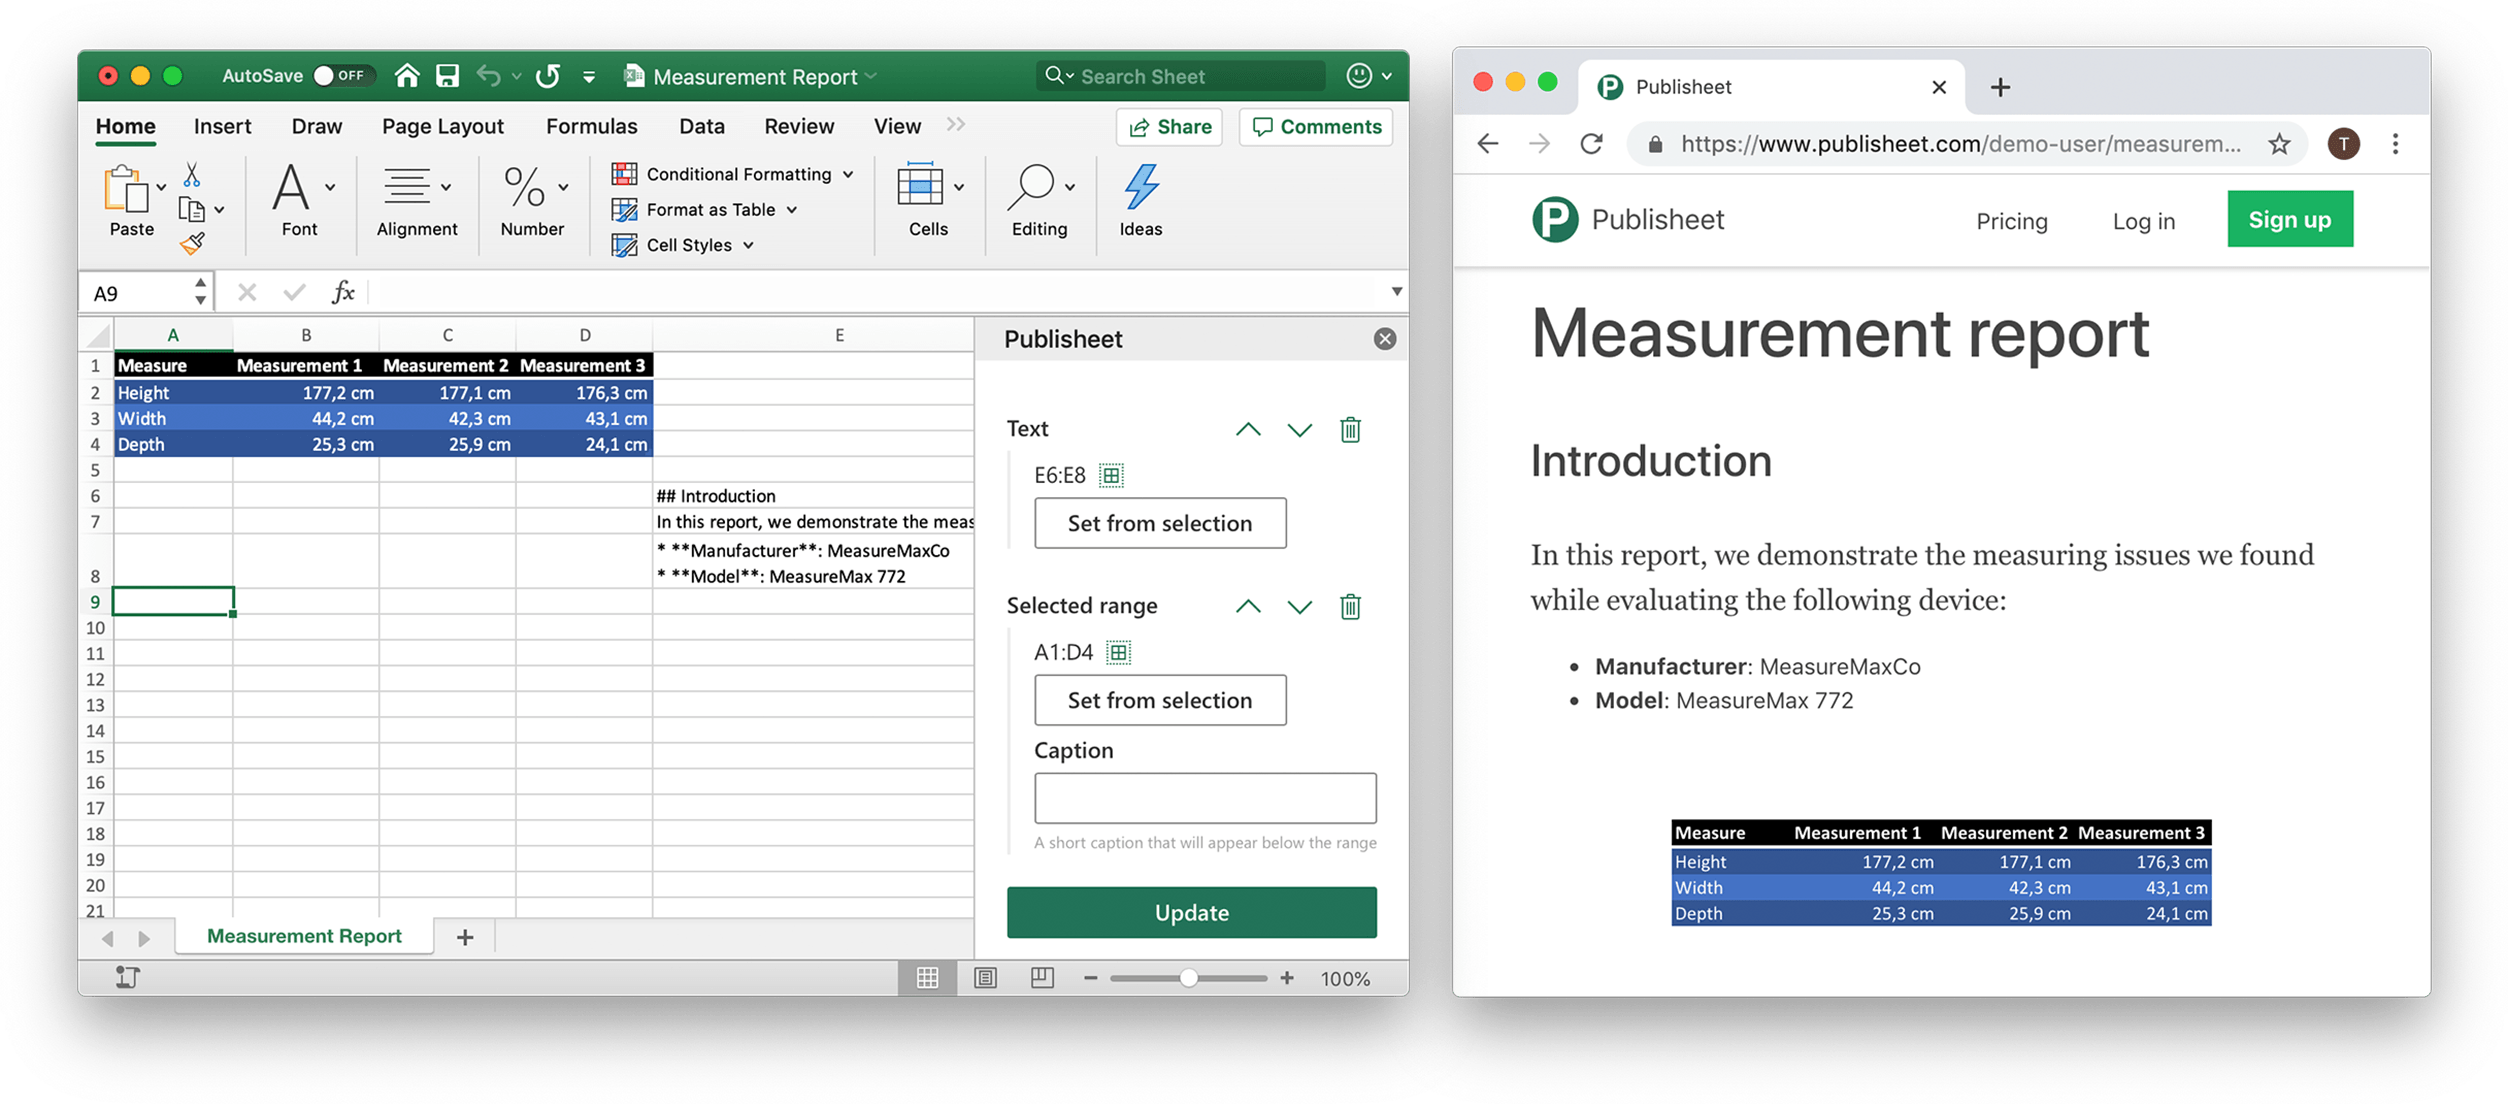
The Text element allows adding text to the published web pages. Say you want to introduce or rationalize a range of data provided in one of the previous elements, you use this element and, just like the range selection, you select one or more cells with your text. Each selected cell in the same element, will be represented as a paragraph of text.
The advantage of this element is that you can step away from the grid/table-based layout and just add regular, rich text. Also note that the text is formatted using the markup language Markdown which allows you to specify different title sizes, bold, italic, bulleted and numbered items, etc.
- To set the range that holds your text paragraphs, just select a single cell or a group of contiguous cells in the same column and press the Set from selection button.
- To see your selected range of text cells in the worksheet, press the cells icon.
In the following image you can see an example of a worksheet where we've used the Text element configured with the cell range E6:E8. On the right you can see the equivalent text rendered with rich formatting in the published web page.